Growing Water Chestnuts in St. Louis
by: Dean Gunderson
If you want to try something new and different this year and still get a fair amount of food than water chestnuts are worth a try.
There are actually two different, unrelated crops that are commonly known as water chestnuts; Eleocharis dulcis and Trapa natans. Trapa natans is a floating aquatic plant that can grow in water up to 15 feet deep whose seeds are eaten whereas Eleocharis dulcis is an aquatic plant that likes to grow in shallow standing water of around 4” deep whose tuber like corms are eaten. It is Eleocharis dulcis that we did a grow trial of at the demonstration garden in 2020 and from here on out that is the species we will be referring to when we say water chestnut.
Although water chestnut is a perennial in hardiness zone 9 and higher where winters only go down into the 20’s at their lowest, in St. Louis it’s grown as an annual. To get a good harvest when growing it as an annual it needs about a 7 month growing season. It’s an aquatic plant that likes to be grown in standing water. Different aquatic plants prefer different water depths but it is generally accepted that about 4” of standing water is optimal for water chestnut. Also like pretty much all crops they do best when they have full sun.
HOW TO GROW WATER CHESTNUTS
FINDING PLANTS AND STARTING SEEDLING
The first thing you need to do to grow water chestnuts is to find water chestnuts to plant. Water chestnut plants are grown by planting fresh water chestnuts, similarly to how garlic or potatoes are grown. The tricky part is that although water chestnuts can be found in just about any grocery store in a can, they are much harder to find fresh, which is what you need. Your best bet is to look at an international grocery store or to find some for sale from a grower online.
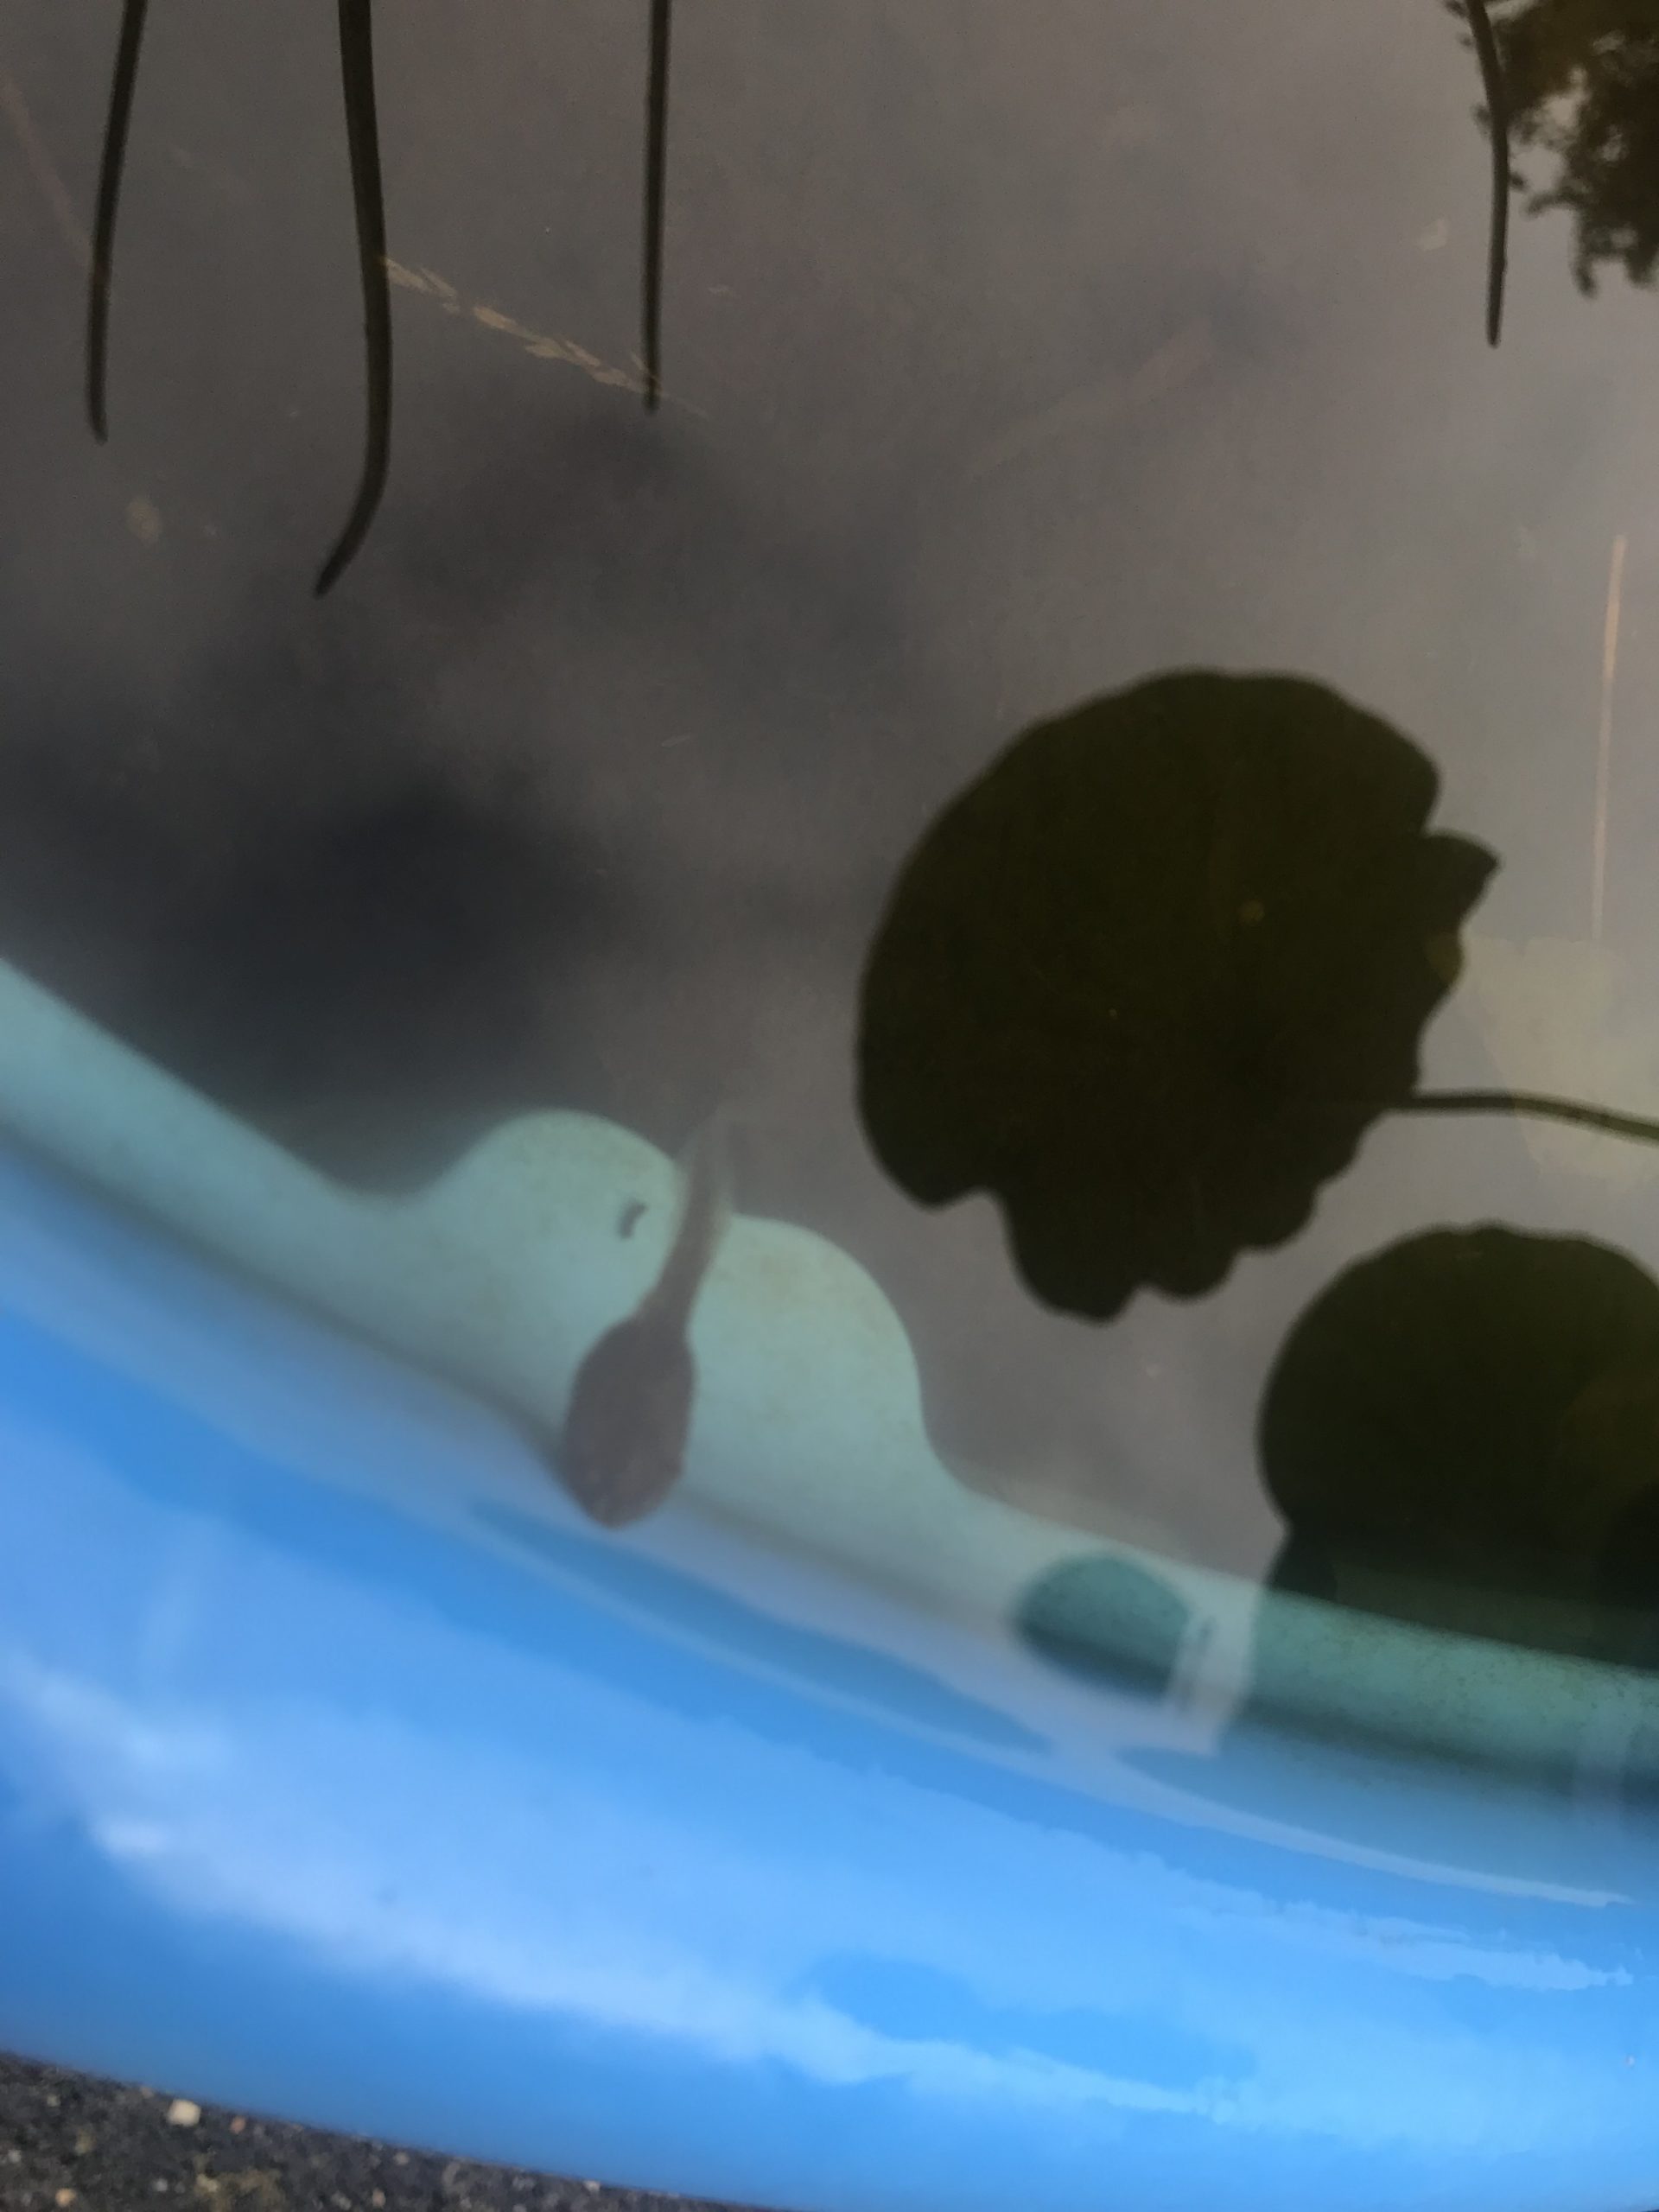
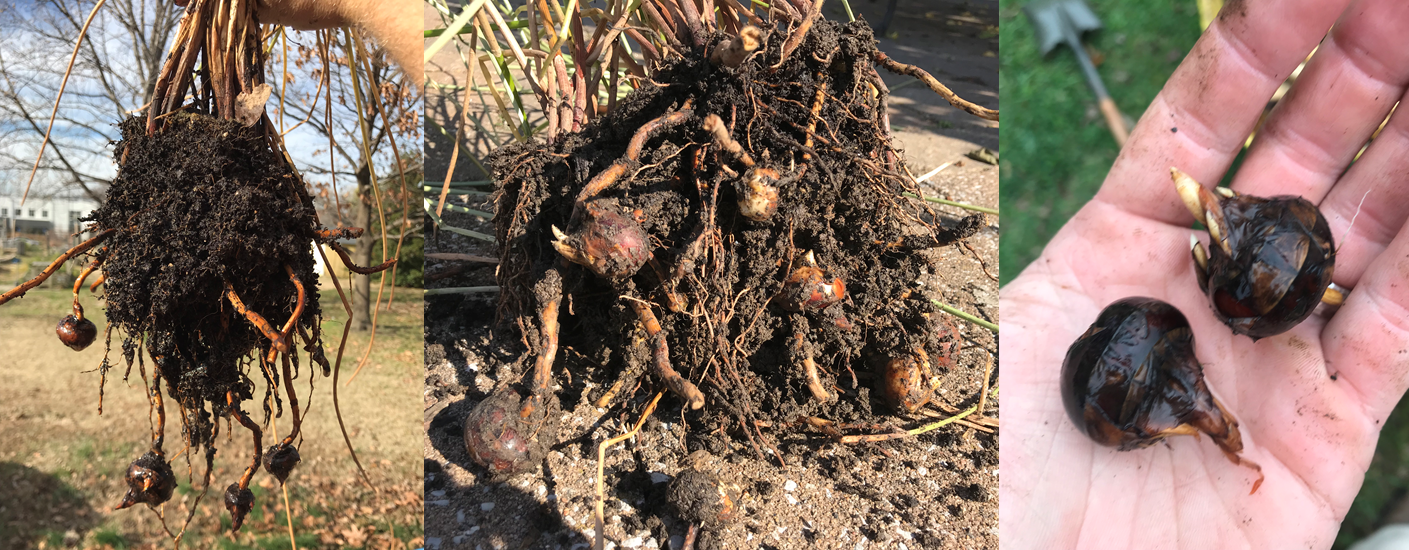
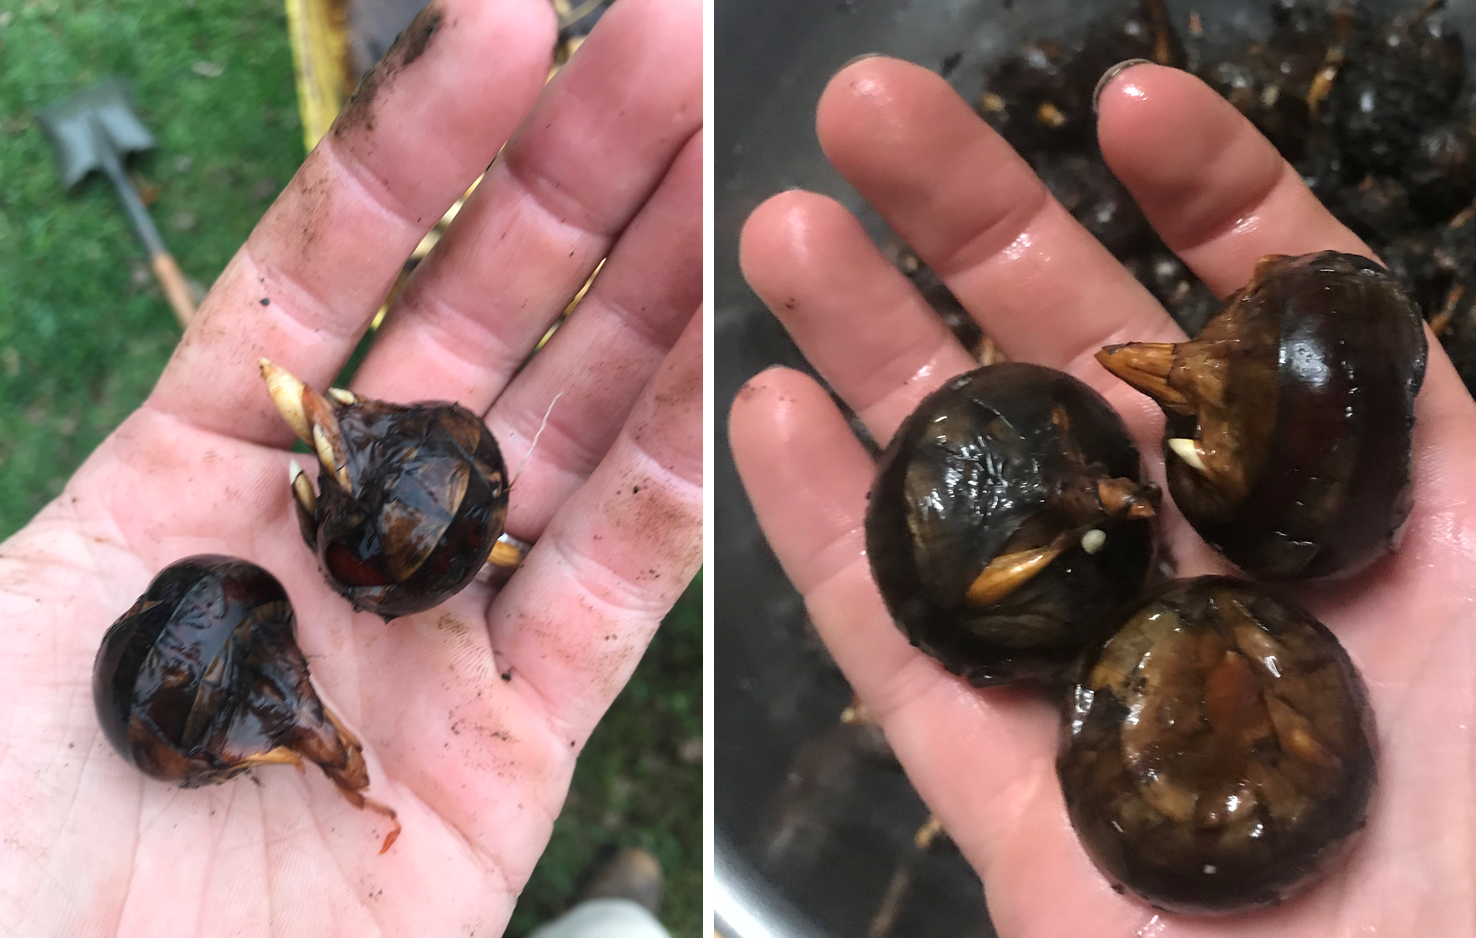
The water chestnuts can be quite small for planting, in fact the ones we got were very small as you can see in the picture. Once we have the water chestnut starts we planted them into individual pots in potting mix and put all of the pots into a tray to hold water. Then we put them under our grow lights just like all of our other seedlings. When they are little they need plenty of water but don’t need to be in standing water so we just watered them until water came out of the bottom of the pots and stated going into the tray beneath them.
At this point you just treat them like your warm season vegetable seedlings, keeping them inside with plenty of light and water until the temperatures warm up.
GETTING A PLANTING AREA READY FOR THEM
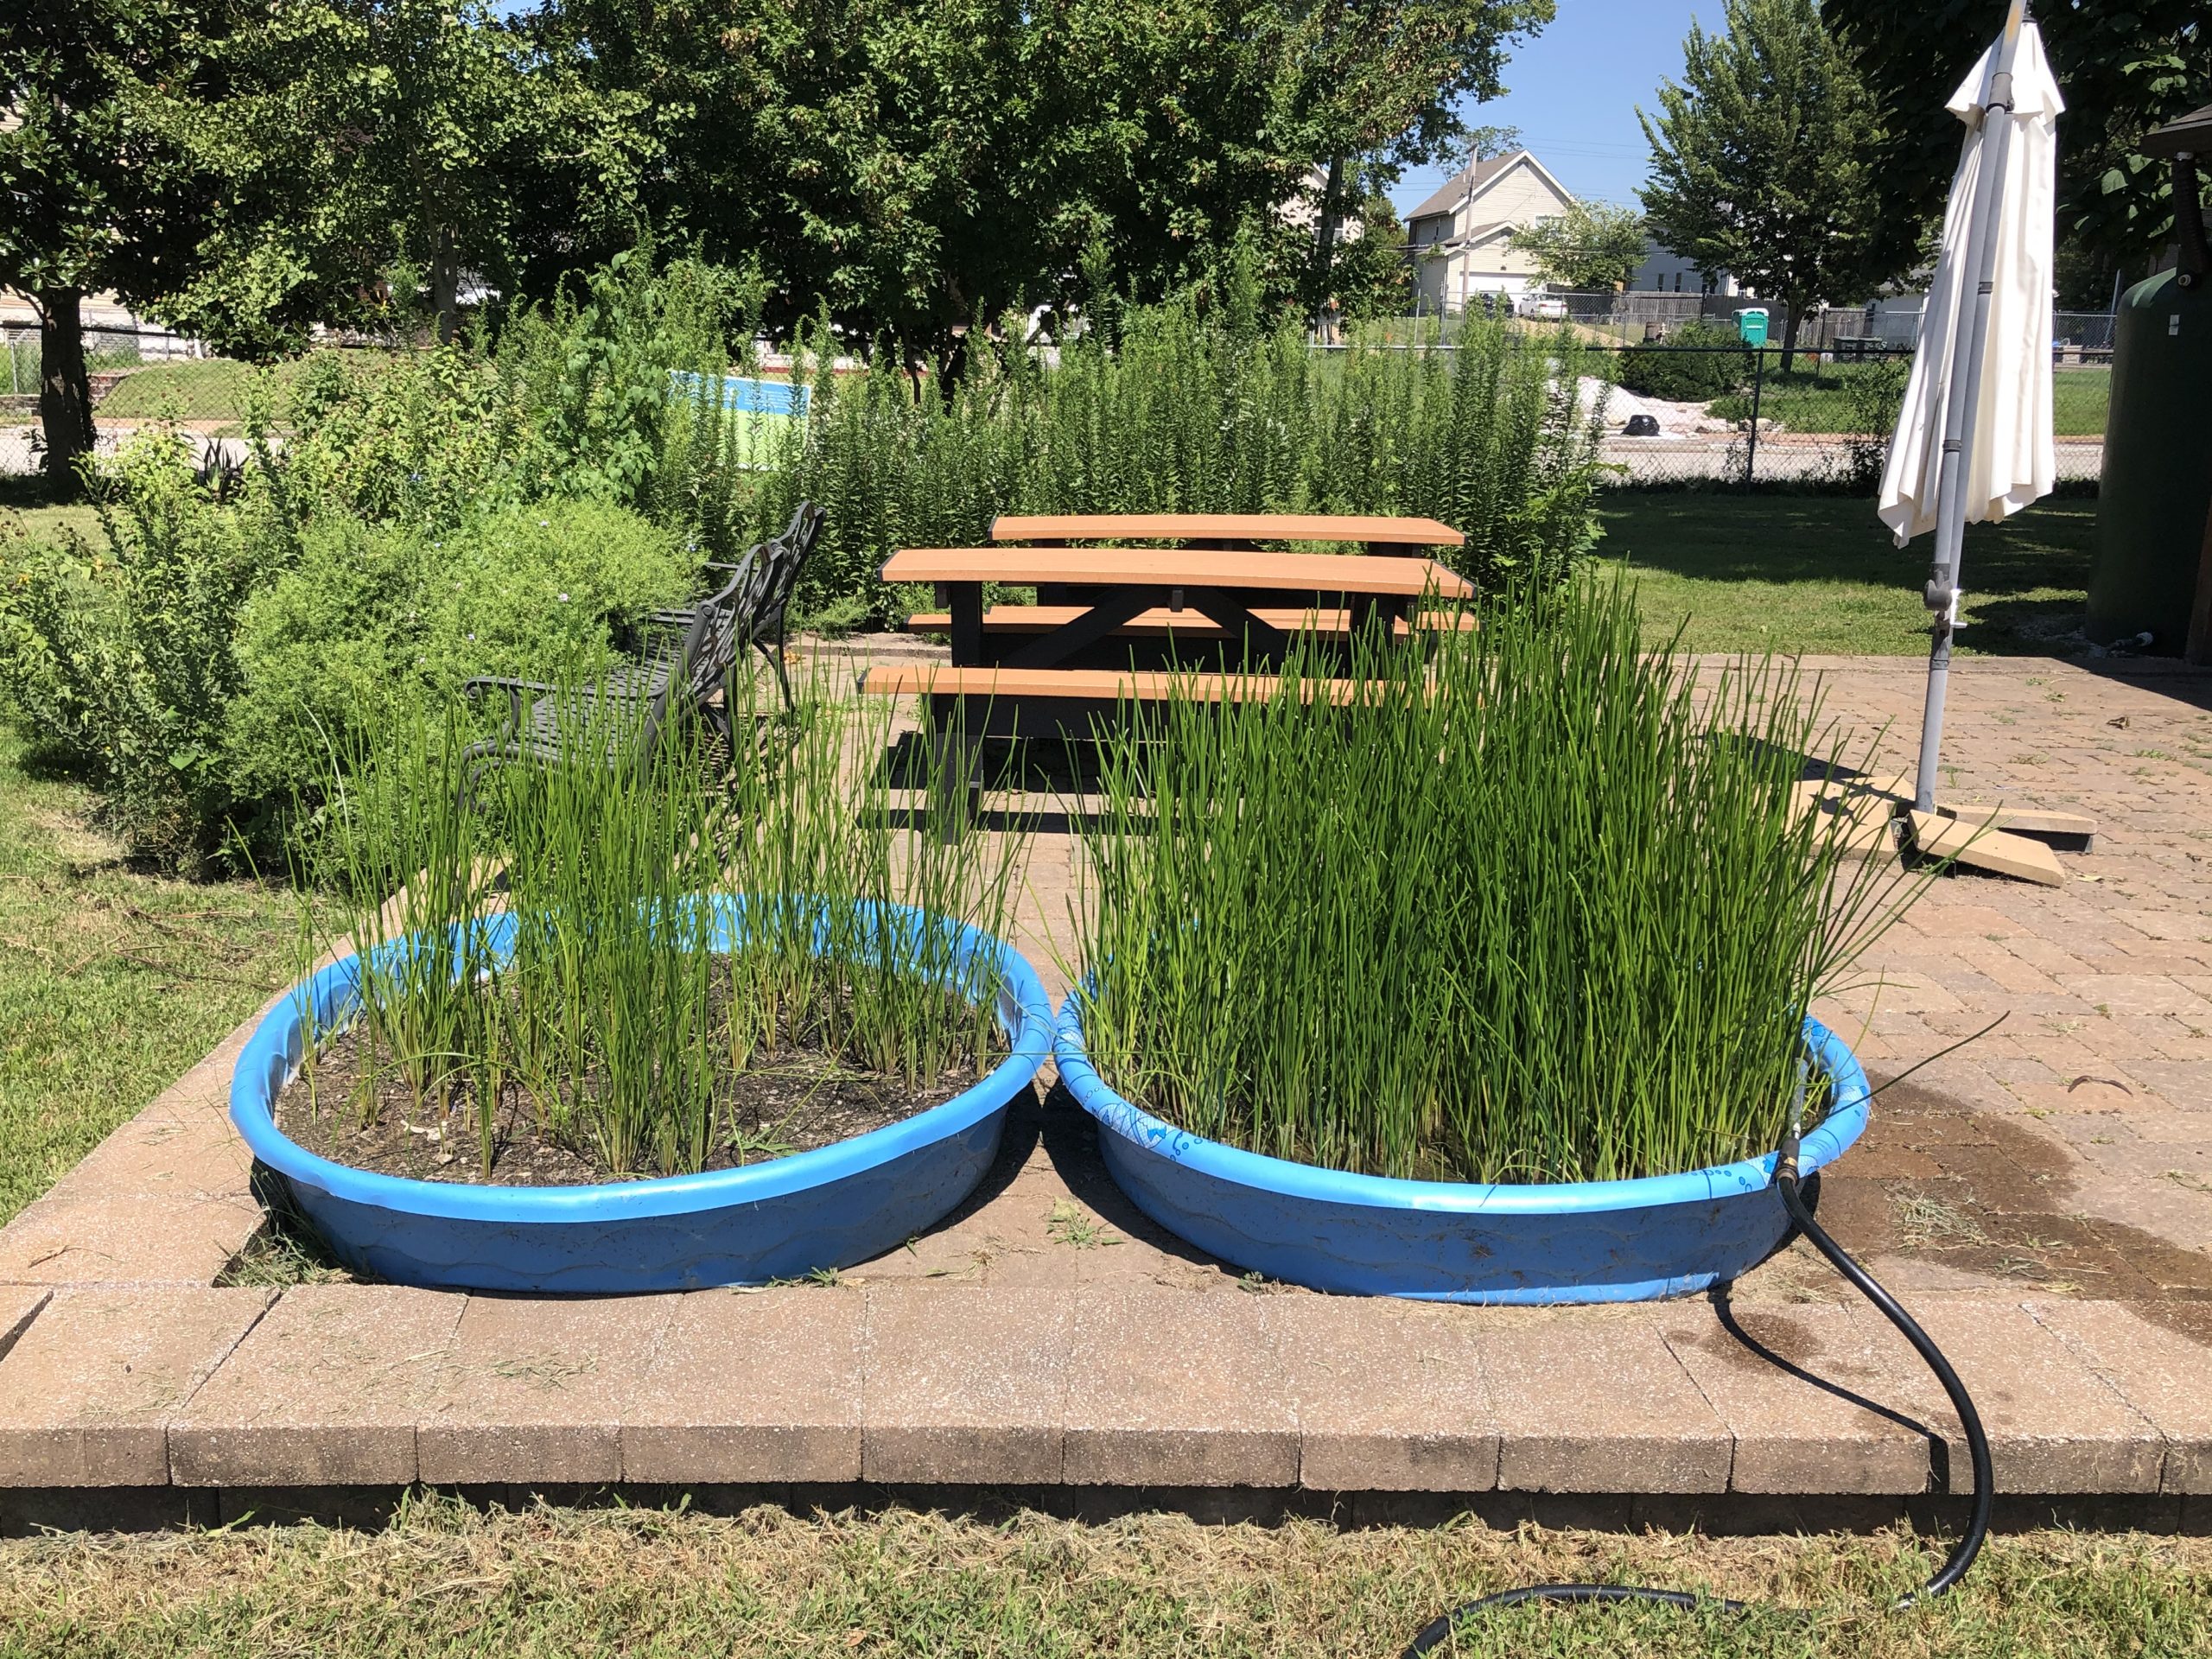
Based on our trials this year any container that can hold water and that you can put in full sun will work. The kiddie pools worked well for us and they are cheap and easy to get. They also give you a pretty large growing area for how much soil you need and for the cost of the container.
Once you have a container picked out you need to fill it with soil. The kiddie pools we had we put 5-6” of soil in the kiddie pool. A good garden mix is best. Since it’s essentially a pot the plants only have the nutrients that are in the soil you put in there, there roots can’t wander so you don’t want to put just topsoil. Nice rich soil is best. We added some potting mix to ours because we had it and it worked but all the perlite (the little white beads that look like Styrofoam) floated to the top.
PLANTING AND GROWING THE WATER CHESTNUTS
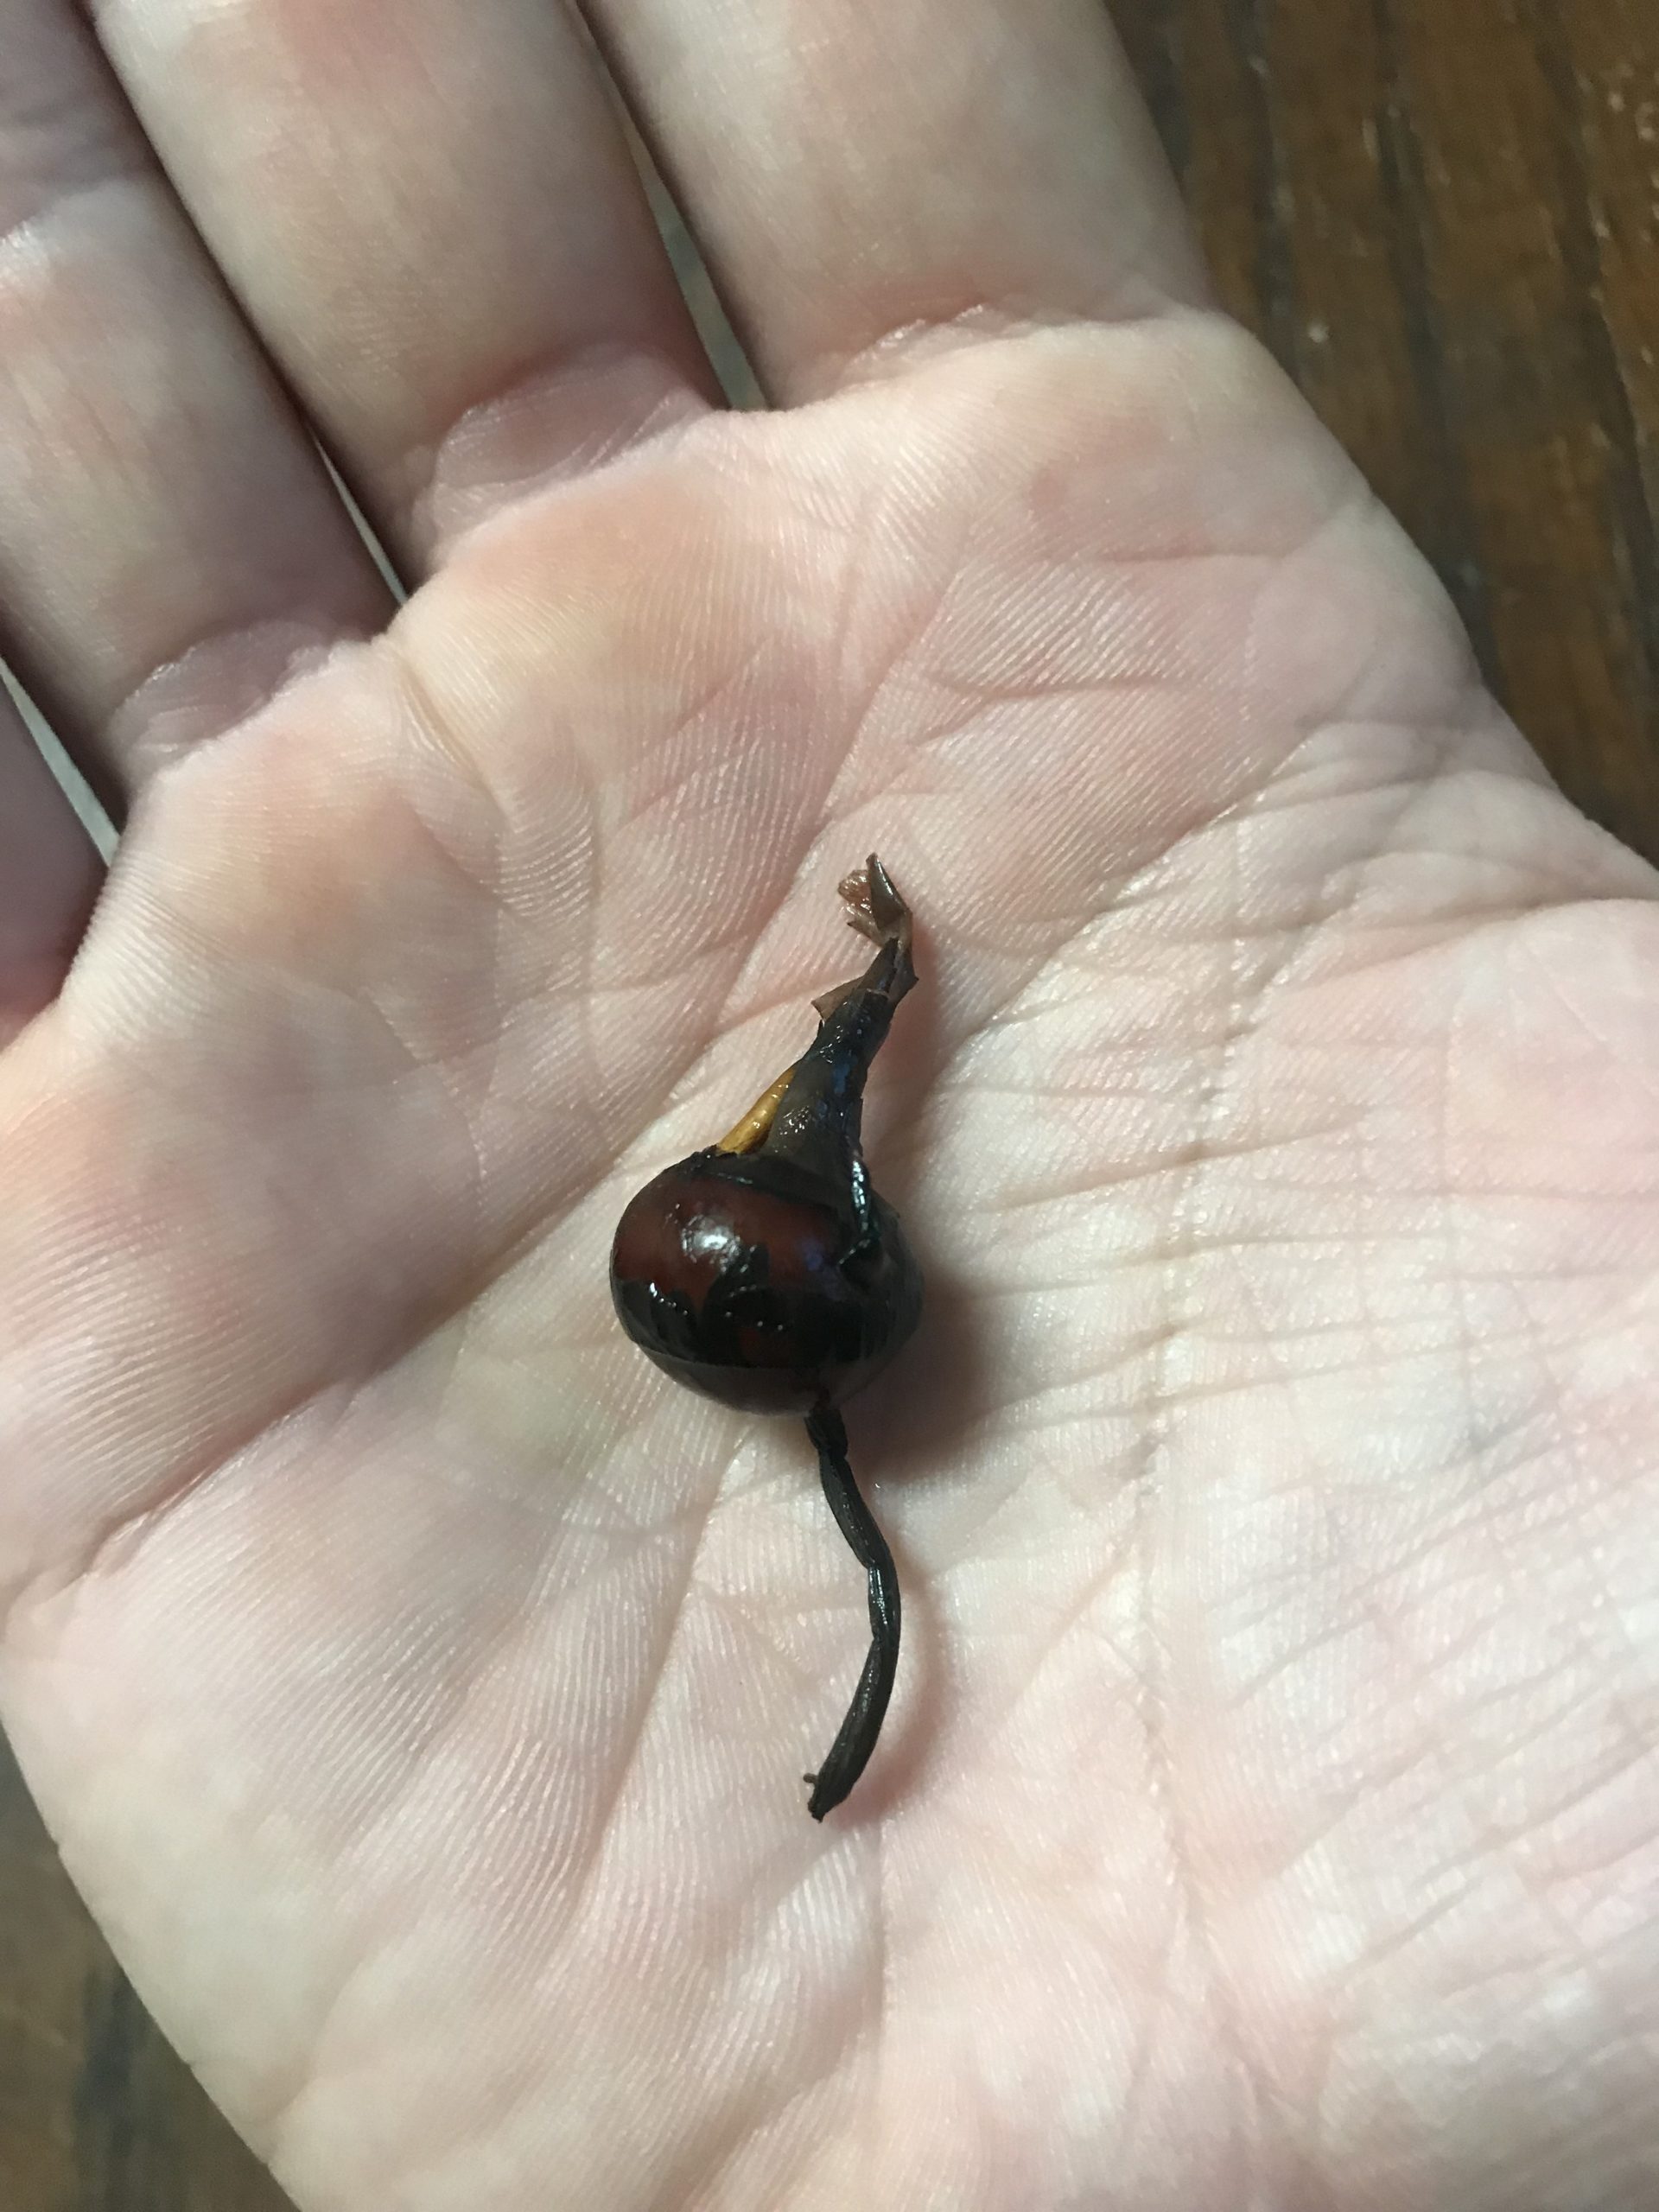
Once your container is prepped it’s time to plant. They are warm season plants so it is best to wait to plant them outside at the same time you would plant your tomatoes, beans, and squash. They spread quite a bit over the growing season so you also don’t need many plants. We only planted 6 little water chestnut plants in each kiddie pool and they were full by the end of the year as you can see in the pictures below.
Once they are planted just water the container until a minimum of one inch of water is standing on top of the entire surface. Then the rest of the growing season all you need to do is add more water anytime there isn’t standing water on the surface. If you keep them watered enough so there is always standing water there will be virtually no weeds and you won’t need to weed the container.
HARVEST
In the fall you will start noticing the tips of the green tops will start turning straw colored and drying out. Over several weeks they will continue to turn from green to straw colored moving from the top down. This is normal and a good sign. It means that as winter is coming the plant is recognizing it and putting the energy that’s in the green tops that are inedible down into the water chestnuts below ground that you want to eat. Once the tops couple of inches are straw colored you no longer need to keep it flooded.
Once the tops are mostly straw colored, or if a cold period down into the mid to low 20’s or lower is coming it’s time to harvest.
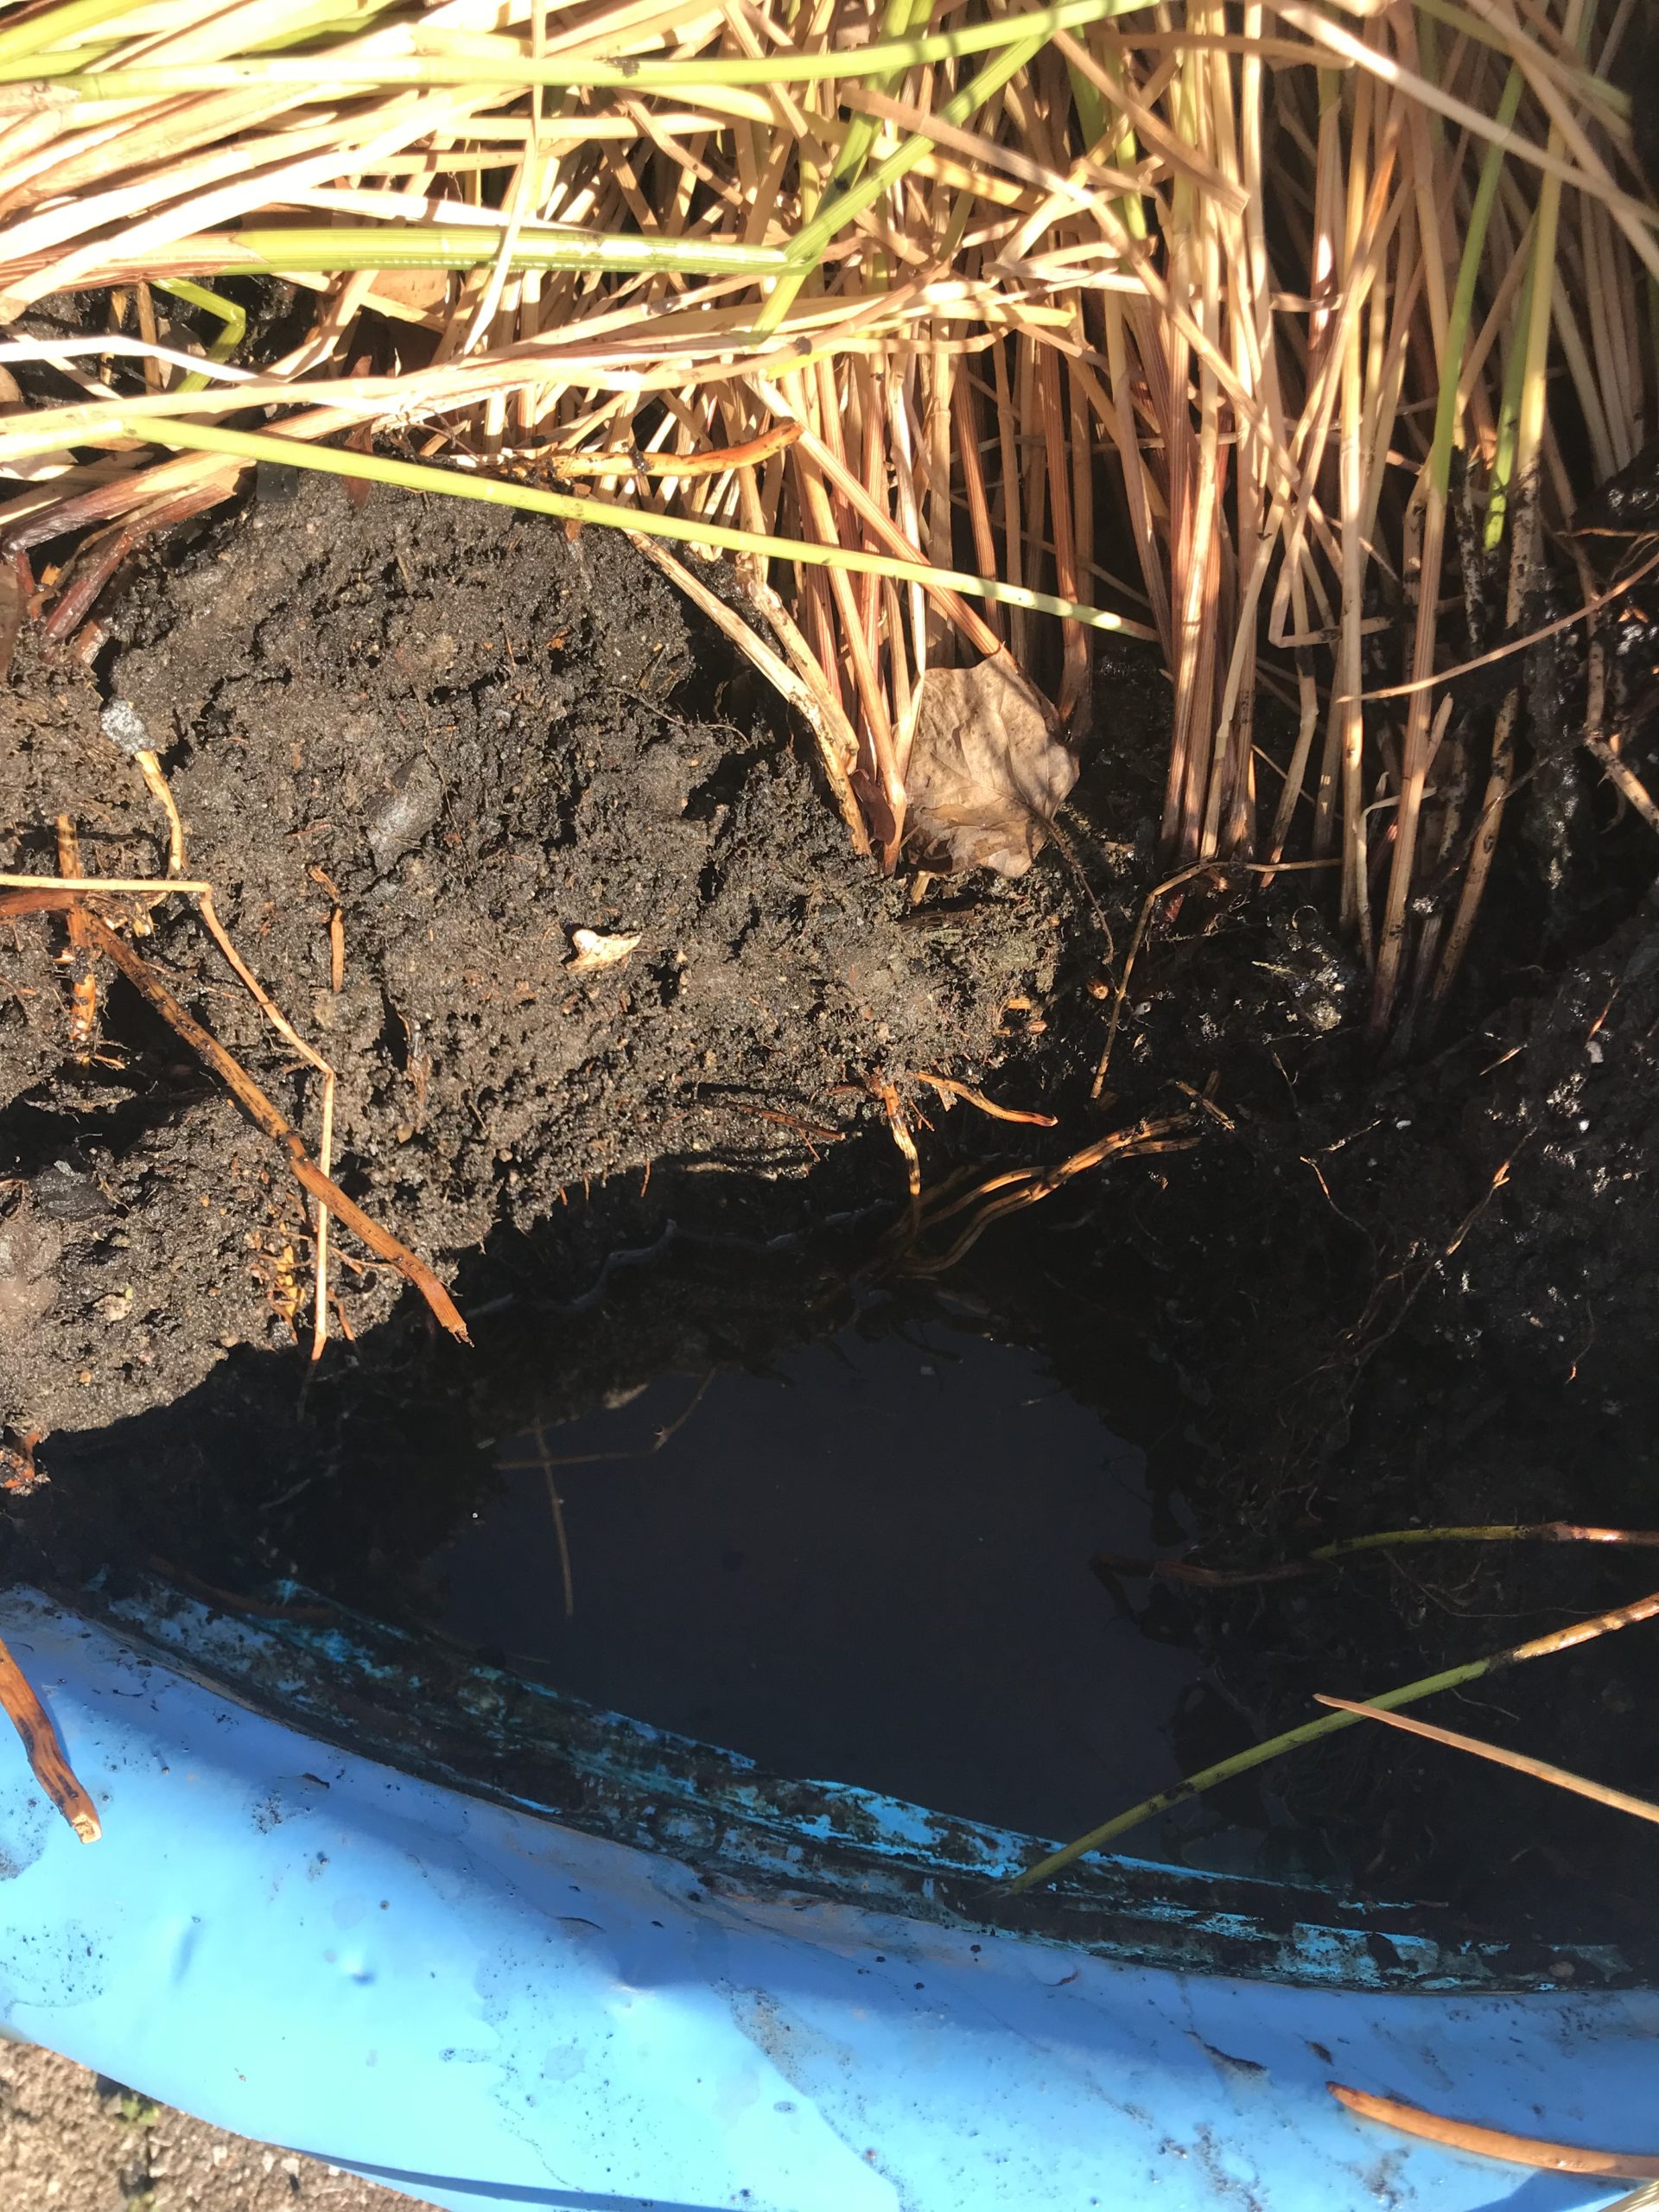
The first step is to drain off the water. The easiest way to do this is to dig a hole in the container all the way down to the bottom on the side big enough for you to reach down to the bottom with a cup or other thing that will hold water. You can see an example in the picture below. Then fill up the cup with the water and dump it out. Continue to do this until the water is all drained from the container.
Then all you need to do is work up the soil with a trowel or your hands. Since the soil is so wet it’s generally easy to just work through the soil with your hands and pull out the water chestnuts as you find them.
STORAGE
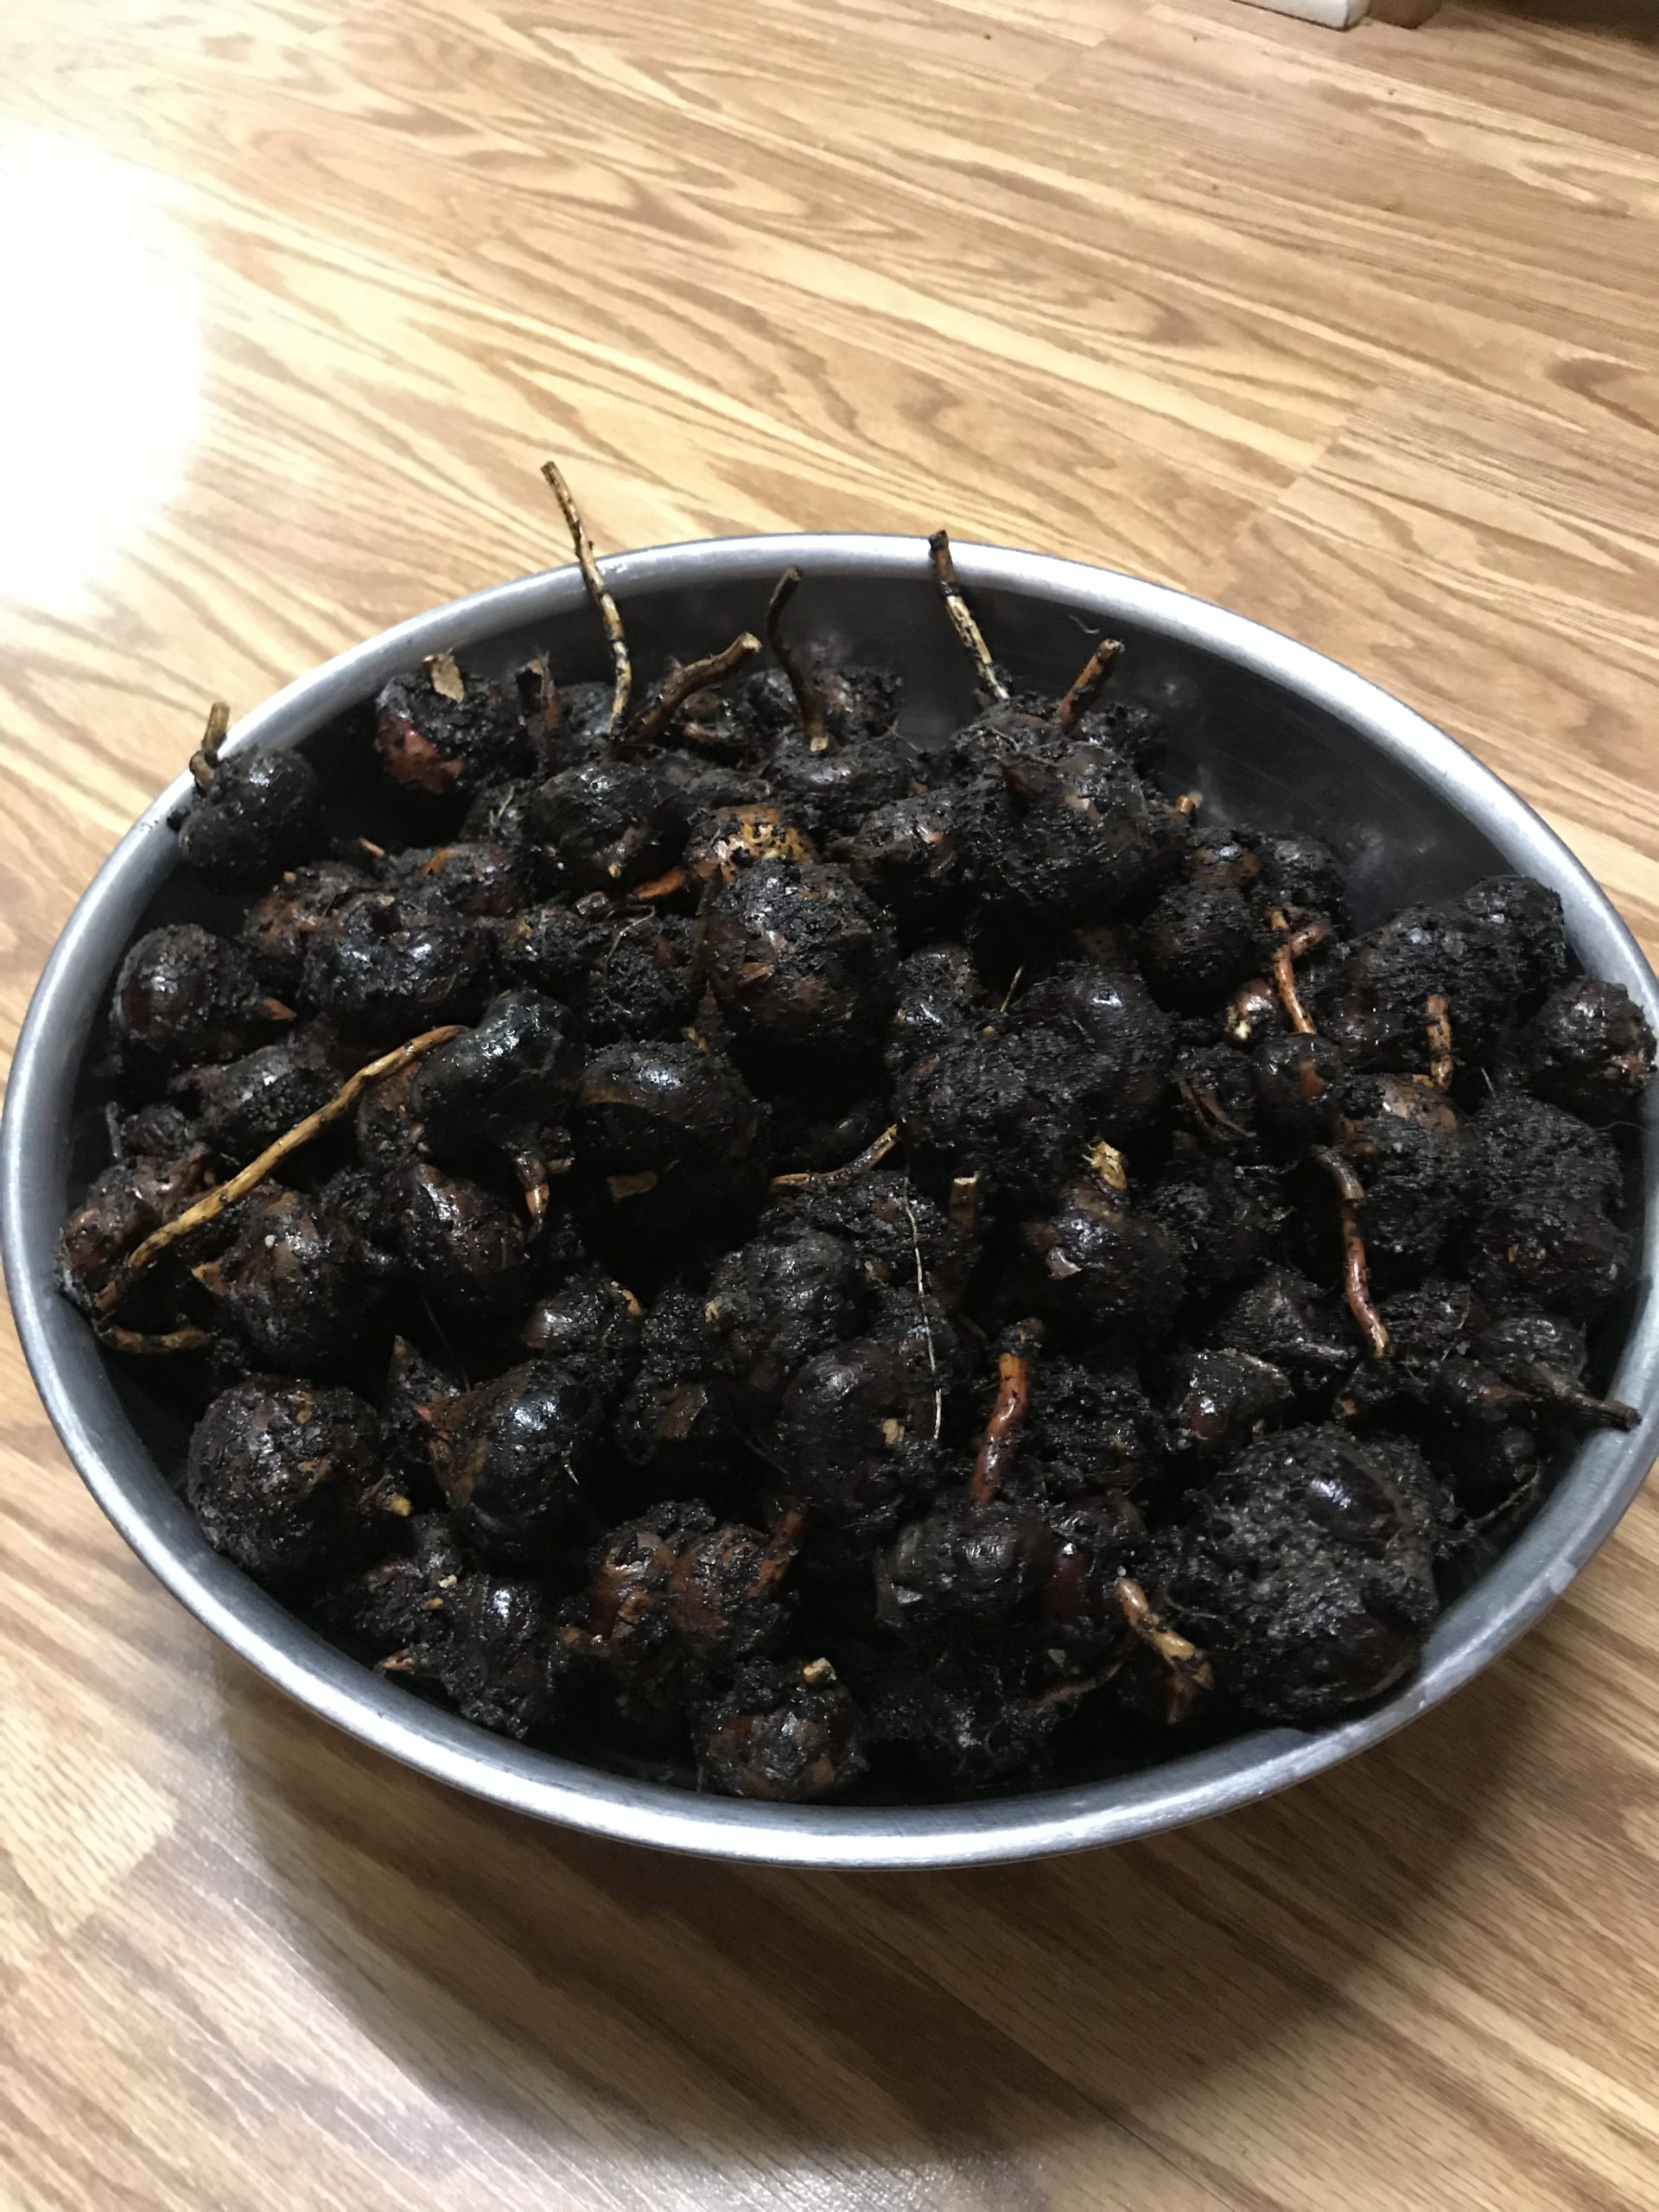
As with most root crops it’s best to not wash the water chestnuts. After harvesting they are generally caked in mud and this is actually good. It will help keep them wet and protected from drying out. Store them in a loosely closed plastic bag in your refrigerator, ideally in the crisper drawer. As of this writing we have had them stored this way for over two months and they are still nice and crisp.
PREPARATION
The only preparation needed is to wash them and peel them. I found the best way to wash them is to take a handful and rub them all together in your hand vigorously under running water and the dirt comes off very quickly. Then peel them with a knife or vegetable peeler.
After that use them however you like. They are edible raw but are also great in all sorts of dishes to add a nice fresh crunch to almost any meal.
OUR 2020 TESTS TO DETERMINE THE BEST STRATEGIES TO GROW
Since not everyone has full sun and because setting up a growing area that will hold standing water might not be easy for everyone we grew our water chestnuts in 4 different beds with different situations to see what was most important to get a good yield of large water chestnuts. The size of the water chestnuts is particularly important because they have to be peeled so even if you get a high yield if they are the size of a large bean it’s not very feasible to peel them vs. ones that are the size of a large walnut are much easier to peel. We used four different beds to compare the impact of soil depth, sun, and water level on yield and the size of water chestnuts. The four beds were as follows
- Bed 1: Full sun 8” deep kiddie pool with several inches of standing water all year
- Bed 2: Full sun 8” deep kiddie pool with a hole in it that was watered heavily but not flooded
- Bed 3: Partial sun 8” deep kiddie pool with several inches of standing water all year
- Bed 4: Full sun 24” deep rice bed with a hole in it that was watered heavily but not flooded
Bed 1 is what is generally recommended by others. Bed 2 is to see if the water chestnuts could be grown in heavily watered but not flooded conditions similarly to how some rice varieties can be grown with minimal yield impacts. Bed 3 was to see how much impact level of sun has on yield and water chestnut size. Bed 4 was to see if a deeper bed would result in higher yields by comparing it to Bed 2 as a simulation of growing it in ground.
TEST RESULTS
What we found from the tests were that the most vital factor to both yield and size of water chestnuts is sun. Bed 3 had by far the lowest yield and smallest size water chestnuts. Most of the water chestnuts in bed 4 were two small to feasibly peel. Water level was the next most important with Bed 2 and Bed 4 yielding more than bed 4 but about half the yield as bed 1 per square foot. The size of the water chestnuts in the unflooded beds were nice and big still. Soil depth seemed to have little to no effect on yield or size of water chestnut. The size of the water chestnuts in Bed 2 and Bed 4 were almost identical and the yields were also very similar. The only real difference that was noticed was that the water chestnuts in Bed 4 were more spread out whereas those in Bed 2 were almost all growing right on the bottom of the kiddie pool so harvest was much faster in Bed 2.
What all of this seems to suggest is that shallow pots like kiddie pools will work fine as long as you grow them in full sun and to maximize yields you really want a container that will allow standing water.
2021 TEST RESULTS
After our success in 2020 we grew water chestnuts again in 2021. We confirmed our results from last year harvesting a pound per square foot in the containers that were in full sun and flooded and slightly less in those that were heavily watered but in containers that had a slow leak. We also confirmed that those that were in full sun produced large water chestnuts. In fact this year the chestnuts were on average much larger than last year now that we know what we are doing, making them much easier to peel.
In total we harvested a little over 29 pounds of large water chestnuts from 1 raised bed lined with plastic and 2 kiddie pools.
After seeing that the water chestnuts grew fine in the kiddie pool that was watered heavily, but had a leak so did not have standing water, we decided the next step would be to see if they could grow in a normal raised bed that was watered heavily. Unfortunately they did not survive, let alone produce a harvestable yield.
We also tested to see if the container size affected the yield or water chestnut size and received promising results. Whereas last year we planted in large kiddie pools about 5′ in diameter, this year we planted in both a 5′ diameter one from last year and a 3′ diameter one to see if the smaller size would have a negative impact on the yields. What we found was although the water chestnuts were slightly smaller than in the larger kiddie pool they were still large enough to peel and the total yield was comparable per square foot.
So our results from last year stand that full sun is critical for large water chestnuts and yield and that the more water they get the higher the yield. We also confirmed last years results that depth of container doesn’t seem vital, with the kiddie pools yielding equivalent to the raised bed per square foot. Finally, we found this year that container size, at least down to a 3′ diameter kiddie pool (7 square feet), doesn’t seem to negatively impact harvestable yield.